Missive is built from the ground up to support not only full-fledged email accounts, but also existing Google Group configurations. Here are the steps needed to properly setup Google Groups on Missive:
-
Everyone in your team must import their personal Google account, the account at which they receive emails from the group address.
-
You must add your Google group address as a Shared address (as opposed to a Shared account). A validation email will be sent to ensure you receive emails sent to this address.
Open Settings > Organizations > Message sharing:

This step is needed because without a shared address defined, your team members will receive emails sent to group@domain.com normally, but in separate conversations, requiring @mentions to bring people together and collaborate.
Adding group@domain.com as a shared address will make sure common emails are shared as soon as they are received.

When adding a shared address, you must determine the collaboration method for new incoming emails. You can choose either the team inbox or the inbox flow.
Note that nobody will see duplicated emails and everyone will have their own unread status. Just like you are used to when using Gmail or other email apps.
-
There are two ways to enable team members to reply From: group@domain.com
-
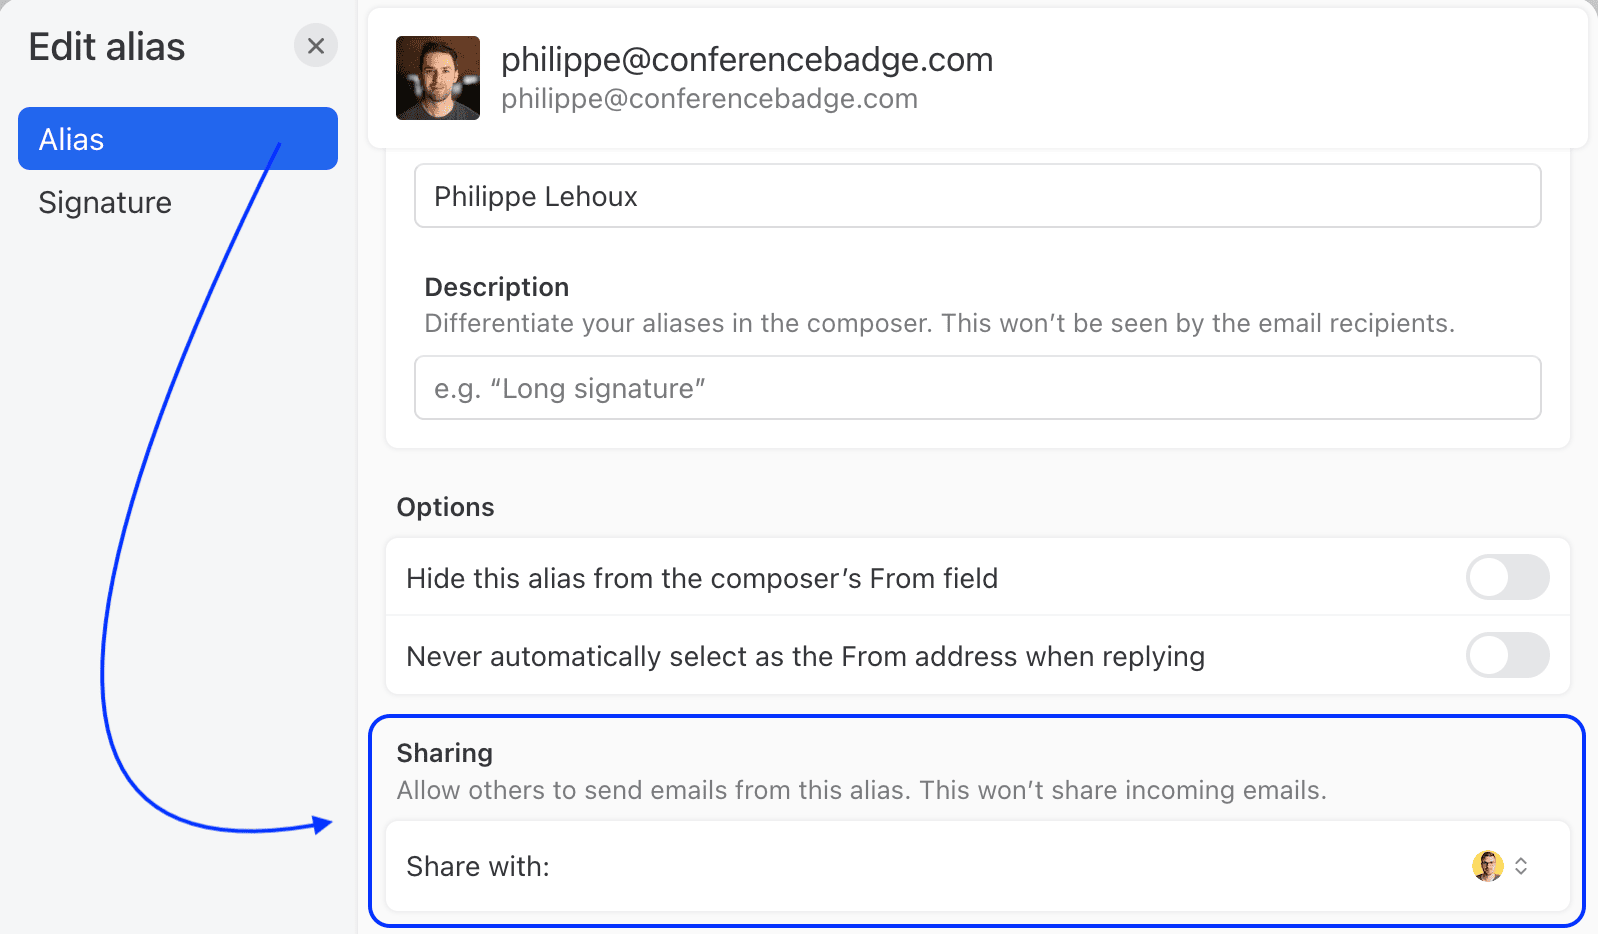
One user can allow others to send emails from the Google group alias set on their account. This setting can be found in Settings > Accounts > Aliases > Edit > Allow others to send emails from this alias.
-
Or, each team member must add an alias in their Accounts settings.
Note With both methods, the email account owner needs to make sure this alias is configured on Gmail as well. Otherwise Gmail will revert the From address to their personal address upon sending.If needed, they can set a different signature than the one used with their personal address. Or a managed signature can be implemented.
-
