Blog →
How to create rules in Outlook: a complete guide
Blog →
by
Eva Tang
January 19, 2026
· Updated on
April 20, 2026
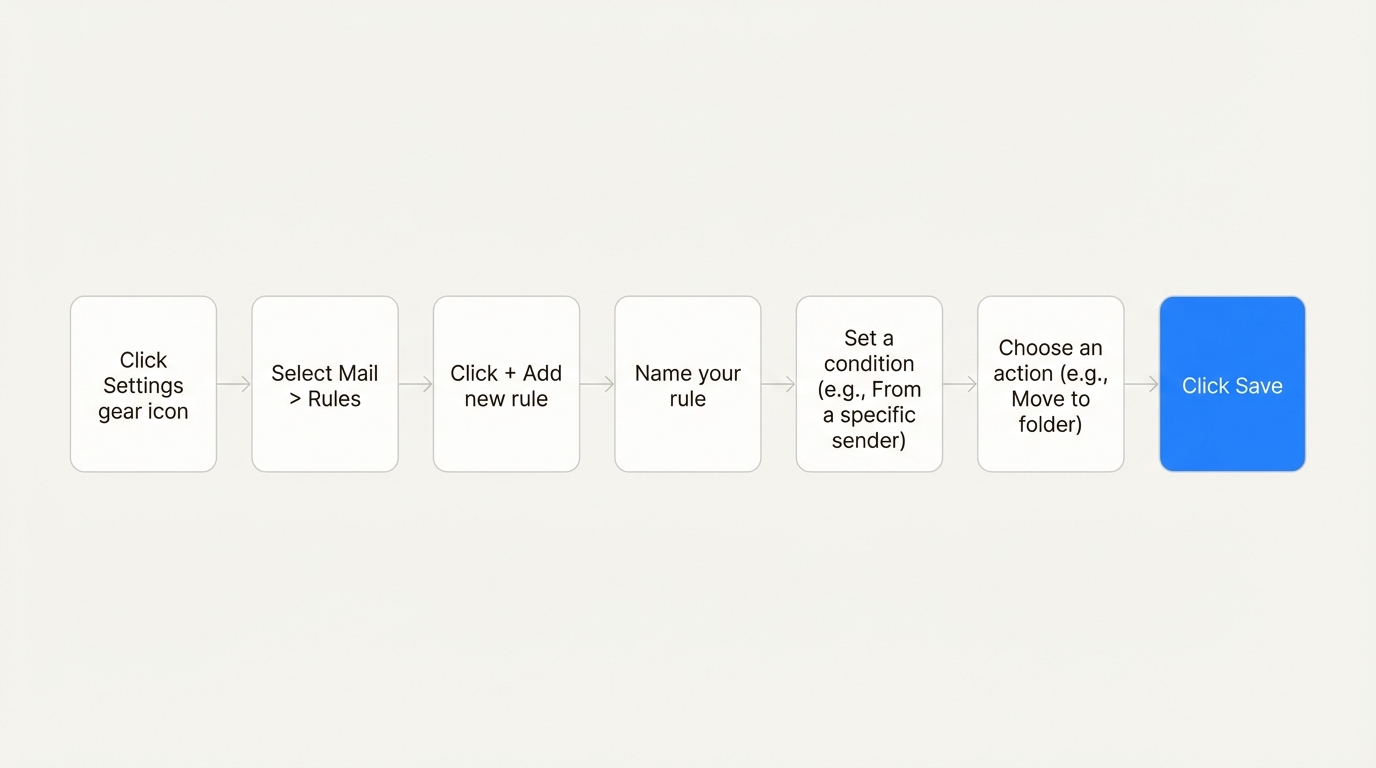
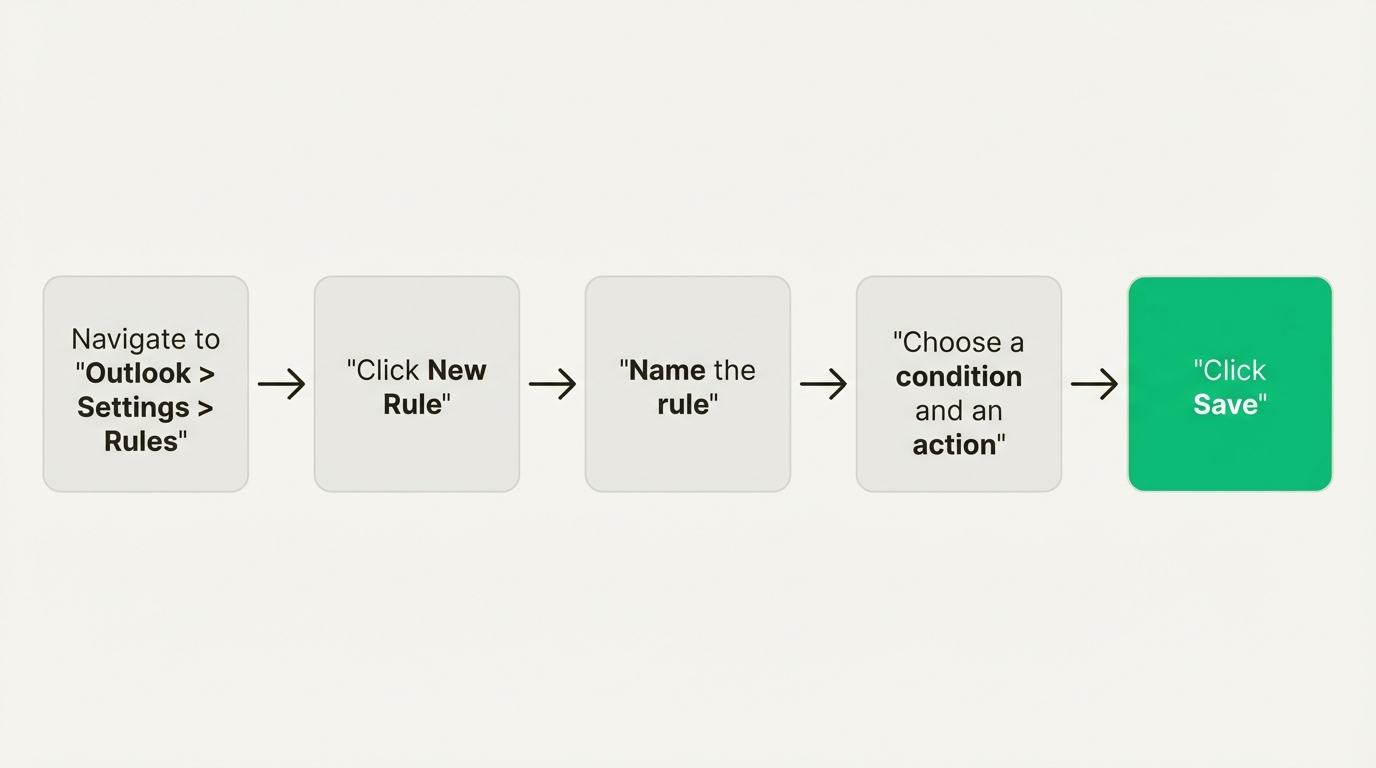
To create a rule in Outlook, open Settings → Mail → Rules (or File → Manage Rules & Alerts in classic Outlook), click Add new rule, set a condition like “From [sender]” or “Subject includes [keyword],” then pick an action like “Move to folder” or “Delete.” Save, and Outlook will run the rule on every new message that matches.
Outlook rules are the built-in way to automate what happens to incoming email. They can file messages into folders, flag important senders, delete newsletters, or trigger alerts. But the exact setup is different in each version (new Outlook for Windows, classic desktop, web, and Mac), and there are a few limitations worth knowing before you invest time building them.
This guide walks through the steps for every version, what rules can and can’t do, and when a different tool is a better fit.
Think of Outlook rules as a set of “if this, then that” instructions for your email. You tell Outlook what to look for in a message, and it automatically does something specific.
The goal is simple: save time, cut down on the mental energy a cluttered inbox drains, and make sure you never miss an important message.
Not all Outlook rules are the same, though. There’s a meaningful difference between server-side and client-side rules, and it can affect whether your automation runs when you’re away from your computer.
Rules are processed in the order they appear in your list, which can cause weird conflicts. A rule that moves emails from your boss to a “VIP” folder might fight with a rule that moves anything with the word “report” to a “Reports” folder. What happens when your boss emails you a report? To prevent that, Outlook has a “Stop processing more rules” option to make sure only the first matching rule fires.
One last thing: storage. Exchange Online limits the total space for all your rules to just 256 KB per mailbox. Once you hit that ceiling, you can’t create or update any more rules. It sounds like a technical detail, but for power users with dozens of workflows, it’s a surprisingly low limit.
The exact steps depend on which version of Outlook you’re using.
The new desktop app and the web version work the same way.
According to Microsoft’s official guide:
One important limitation: the new Outlook does not support rules for third-party accounts you’ve connected, like Gmail or iCloud. For those, you’ll have to set up sorting rules directly with that email provider.
The classic desktop version has the most detailed options, accessible through its Rules Wizard. It’s also where you’ll have to think about the client-side vs. server-side distinction.
There are two main ways to start:
The Rules Wizard walks you through a few steps: choose a template, set your conditions (the “if”), pick your actions (the “then”), add any exceptions, name the rule, and turn it on.
A useful feature here is the “Run this rule now on messages already in the current folder” option. It’s good for cleaning up an existing folder right after you create a rule.
Certain actions, like displaying a desktop alert, will trigger a warning that the rule will only run when Outlook is open.
Outlook for Mac recently simplified its approach. To make rules more reliable, it now only supports server-side rules. Your automation will always work, even when the app is closed. The trade-off is that client-side actions like custom sounds are no longer available.
Here’s how to set one up:
Now that you know how to build rules, here’s where they shine and where they fall short, especially for teams.
For managing your own personal inbox, Outlook rules are capable. They’re particularly good at a few things:
These features were designed for individual use. In a team setting, the limits show up fast.
sales@company.com. That work stays manual, which means duplicate replies or missed emails.These limits show that Outlook rules are built for individual productivity. For teams that need collaborative automation across multiple channels, a different tool is a better fit.
Outlook rules are a great starting point for taming your personal inbox. When workflows involve multiple people, though, the individual-focused model runs out of room. If your team needs shared ownership, clear accountability, and a single place for all customer conversations, a more capable rule system is worth looking at.
Missive is a collaborative email client built for teams. It connects your team’s shared addresses (support@, sales@, info@) alongside personal inboxes, and it handles email, SMS, WhatsApp, Instagram, Messenger, and live chat in one place. Missive’s rules can do everything Outlook rules do and more: assign conversations in a round-robin, add internal comments for context, apply shared tags, and run automations across every channel, not just email.
Three examples of what Missive rules can do that Outlook rules can’t:
Here’s a deep dive into the difference between personal rules and organization rules:
In the new Outlook for Windows or Outlook.com, go to Settings > Mail > Rules > + Add new rule. Give the rule a name, pick a condition (like “From [sender]”), pick an action (like “Move to [folder]”), and save. In classic Outlook, go to File > Manage Rules & Alerts > New Rule to open the Rules Wizard. In Outlook for Mac, go to Outlook > Settings > Rules > New Rule.
Create a rule with a condition that matches the emails you want to sort (for example, “From: newsletter@example.com” or “Subject contains: Invoice”), then set the action to “Move to” and pick the folder. Check “Stop processing more rules” if you have other rules that might conflict. New messages matching the condition will land in the folder instead of your main inbox, and you can also run the rule on existing messages in classic Outlook via the “Run rules now” option.
In classic Outlook for Windows, right-click the email and select Rules > Create Rule. Outlook pre-fills the conditions based on the selected message (sender, subject line, recipients), so you can confirm or tweak the details rather than building the rule from scratch. In the new Outlook and on Mac, the right-click option is more limited; you’ll usually need to open the full rule editor and enter conditions manually.
Yes, but with caveats. You can create a rule with the action “Forward it to [email address]” to automatically forward matching messages. However, many organizations disable external auto-forwarding by default as a security measure against phishing and data exfiltration. If your rule silently stops working, check with your IT admin first.
The three most common reasons: (1) the rule is client-side and Outlook is closed, so it won’t fire until you open the app; (2) you’ve hit the 256 KB rules storage limit, and new rules are being silently ignored; (3) rules earlier in the list with “Stop processing more rules” are intercepting the message first. Microsoft has a broken rule troubleshooter for the first issue, and you can free up space by deleting unused rules or consolidating them.
Rules created on desktop or web will run on any device as long as they’re server-side. You can’t create or edit rules from the Outlook mobile app directly; you’d need to open the web version in a mobile browser to make changes.
Outlook rules are per-user and email-only. Missive rules are team-level and cross-channel. A Missive rule can assign an incoming conversation to a specific teammate, apply tags visible to everyone, add internal chat messages for context, and run across email, SMS, WhatsApp, Instagram, and live chat. Outlook rules can’t assign, can’t add team notes, and don’t know about anything outside of email.
Missive is a collaborative email client built for teams that have outgrown personal rules. Connect your team’s shared addresses, automate assignments with AI-powered rules, and handle every customer channel from one place. Try Missive free.

March 27, 2023
11 Email Etiquette Rules to Follow for the Best Customer Service
The 11 email etiquette rules every customer service team needs—from grammar and tone to canned responses, follow-ups, and response times—with practical tips for writing emails customers actually appreciate.

May 18, 2022
Best Small Businesses Collaboration Software for Teams
The best collaboration software for small businesses. Tools recommended by a small business owner for other...

December 14, 2022
Text vs email vs call: when to use each for customer contact
Text, email, or call? Each has a clear best use case. Here’s how to pick the right channel for every customer interaction, and why mixing them up costs you the response.

March 29, 2022
How to Create a Dynamic Email Signature?
Learn how to use Liquid templating in Missive to create email signatures that change automatically—like adding “Have a great weekend!” on Fridays, rotating seasonal messages, or embedding satisfaction surveys.

October 8, 2020
How to add live chat to Shopify (and actually manage it as a team)
Adding a chat widget to your Shopify store takes five minutes. Managing those conversations as a team without dropping the ball? That’s the real challenge. Here’s how to set it up right.

May 26, 2023
9 Tips & Examples to Write Effective Customer Service Emails
Write effective customer service emails with these tips & examples. Find out how to create a positive...

October 31, 2023
8 Steps to Customer Service Recovery (with templates)
Learn the 8 steps to recover from a customer service failure—plus free email templates for apologies, follow-ups, and escalations that turn frustrated customers into loyal ones.

March 1, 2023
Declutter Your Email Inbox: How to Organize Your Work Emails
Learn how to declutter your inbox & increase your productivity at work with simple tips.

November 14, 2023
11 best email management software in 2026 (+ how to choose one)
Email management software helps you spend less time in your inbox and more time on actual work. Here are the 11 tools worth considering in 2026, what each is best for, and how to pick one that fits your team.
